With winter came a long period of inactivity on my blog. While, I have not been able to write about it much, it has been fun. Almost every other weekend, either we were hosting friends or getting invited to their places. Food was an integral part of this socializing. So I got several opportunities to experiment. Sometimes, it was a matter of recreating and perfecting an old special item. Sometimes, I dabbled in new cooking style. Sometimes, it was an effort to make something at home that I have often enjoyed eating outside.
Today’s post falls in that third category. I have immensely enjoyed Mediterranean food, since I first tasted it in various ‘Türkische Imbiss’ in Berlin. Thankfully, Michigan has not disappointed me either. Now and then, my husband and I go to the nearest middle-eastern eatery to enjoy shawarma, kebabs, falafel, and of course… a basket full of piping hot pita breads.
I really wanted to be able to make these breads from the mixed grain wheat flour I have at home, which I use for making Indian flatbreads of roti and parantha. After a few mistrials, I finally decided to try making those with the ‘boule’ master recipe, which I had used last year to bake bread loaves. I got this recipe in the book ‘Artisan Bread in Five Minutes a Day‘ by Jeff Hertzberg and Zoë François. While it calls for unbleached, unsifted, all-purpose white flour, it has worked with my usual whole wheat/ multi-grain flours. So here is my way to pillowy and pliant pita flatbreads.
PITA FLATBREAD (WITH MULTIGRAIN WHEAT FLOUR)
Yields about 8-12 breads, depending on the size you roll.
Ingredients:
3 1/4 cups of multi-grain wheat flour, plus some more for dusting
1.5 cups of lukewarm water (only a tad more that body temperature)
1 sachet of yeast (roughly about 1 heap full of a tablespoon)
A pinch or two of salt
Method:
- Mix the yeast and salt in water. Let it proof for five minutes.
- Add the flour to this water and mix the dough with a spatula.
- If needed, with wet fingers, lightly mix the dough so that there are no dry patches. No kneading is necessary any further. It makes a rather shaggy loose kind of a dough, but that is what we want.
- Cover the dough with a loosely-fitted lid and let it rise for two hours.
- After the first rise, the dough can be used to make bread. Though, I like to refrigerate it overnight to make it more manageable.
- To make pita, dust your platform and fingers with some dry flour. Form a ball by pulling the top of dough to bottom repeatedly for about a minute or two.
- Divide it in smaller balls/ patties to make pitas.
- Dust a patty with dry flour and roll lightly to make a circle (width of which should never go less than 1/8th inch). Sprinkle with flour while rolling, whenever necessary.
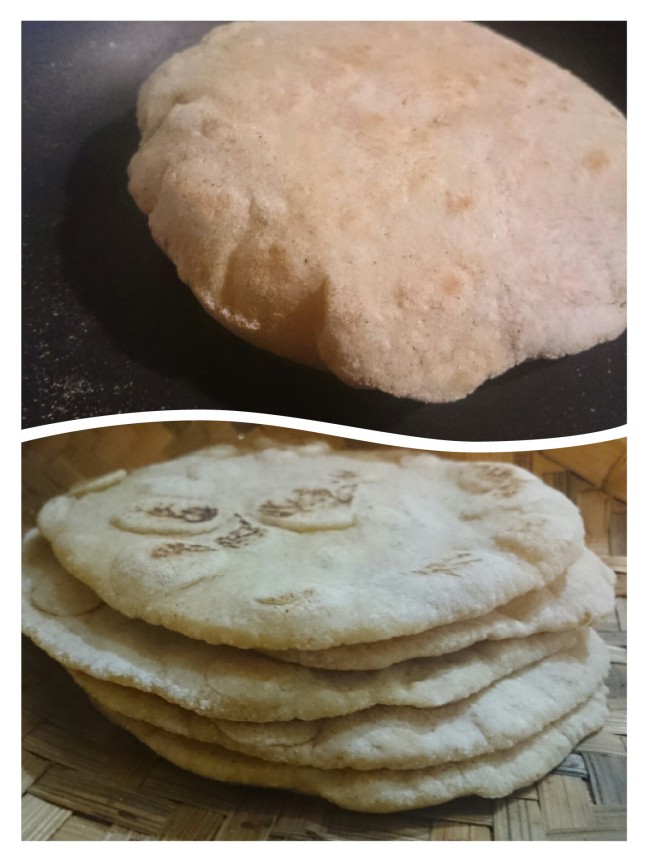
- Heat a cooking pan/ griddle to medium-high heat and place a freshly rolled pita onto it.
- Wait till you see bubbles on the surface, and then flip it to another side.
- Now it will start puffing up. Lightly press bulging pita on all sides to make sure it gets baked uniformly.
- Flip more than once to get those nice brown spots on both the sides of flatbread.
- Remove from the pan and let it cool on rack
- Now, conquering the temptation to devour this soft bread right away, turn your attention to rest of the pitas to roll and bake 🙂
After cracking this perfect recipe for homemade pitas, the possibilities to use it are endless. We have so far enjoyed these with hummus, herbed yogurt dips, grilled tempeh, sautéed vegetables, and curries… oh and even, guacamole once. So go ahead and make your combos, with no further doubts!
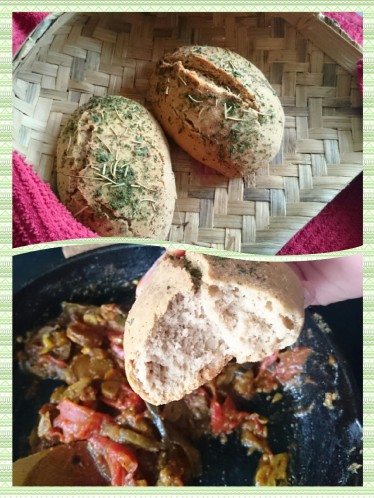 Continuing my experiments with home baking, now I wanted to try something that would take less investment of time and energy and can be incorporated in the daily rush. My evening are bit packed. It gets rather difficult to be able to bake the bread loaf after coming home. So I wondered if a bread dough could be left rising overnight and whether I could bake the roll on next morning.